React Starter Tutorial
Created for CSE 370
Getting Started
Part 1Part 2
Part 3
Part 4
Part 5
Part 6
React Routing
Styling the navbar
Part 9
Part 10
Part 11
Part 12
Part 13
Part 14
Conclusion
Additional Resources
W3Schools React TutorialOfficial ReactJS Tutorial
ReactJS Documentation
Routing and Navigation
Styling our navbar
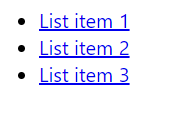
Right now, our navbar is nothing more than a boring list.
We need to add some css to make this look more user-friendly. Create a stylesheet called navbar.css in the same directory as your navbar.js file. Then, import the stylesheet into navbar.js using the following code:
import './navbar.css'
First, we’re going to change the style of the list elements. We’re going to make the display inline block, so that the elements are side by side and can have top padding and margins. If we just made them inline, we wouldn’t be able to give the list elements padding on the bottom or top. We’re also going to add some padding and change the font size.
li{
    display: inline-block; // set the display style to display inline
    padding: 10px 20px 10px 20px; // add padding to all sides (10px on the sides, 20px on the top and bottom)
    font-size: 18px; // set the font size to 18px
}
Now we’re starting to see something that looks a little bit more like a navbar. We can start by adding a background to our navbar by styling the ul tag. In this demo, I’m going to make it black. We can then remove the underlines from the list items, as well as set the color to white for some good contrast.
 ul {
     background-color: black;
 }

 li a{
     text-decoration: none; // remove the underline from links
     color: white; // set the text color to white
 }
When you see one type of html tag after another in a css document (like li a), that means that the style rules will apply to all tags of the second type which are children of tags of the first type. More concretely, in this example, the style will apply to all anchor tags inside list-item tags.
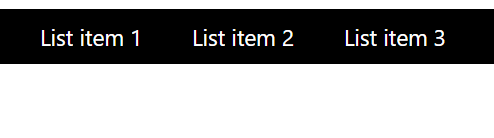
Now our navbar is looking a little bit more appealing. The only problem is, when a user hovers over a navbar item, they expect to be able to see some feedback indicating that the link is clickable. We’re going to need to add some styling to fix that.
li:hover{
    background-color: green;
}
:hover is an example of something called a selector. It allows you to selectively style elements only under certain conditions. In this case, we want to apply the background color only when the user hovers over the element with their cursor.
Now our navbar is looking production ready stylistically, but it doesn’t do anything. In the next section we’re going to look at how to leverage React routing to create a working navbar.